Thursday, January 27, 2011

Avoiding yarn twist--why does it matter?

The two most recent posts touched on yarn twist and how to avoid it.  However, in a surprising twist (har!) an important point was overlooked. As MB wrote in the comments: "There's one detail I don't understand yet--why does it matter if the yarn twists?"

What a great question!

Yarn, of course, is twisted in its very nature--that's how it's made. Specifically, yarn involves imparting twist to overlapping lengths of raw fiber--the twist holds the fibers in place. In other words, yarn is twisted out of raw fiber--no twist, no yarn. The problem is therefore not twist itself, but too MUCH twist--overtwist as it is sometimes called.

Spinners, both hand- and commercial- have come up with clever, clever ways of restraining the power of the twist to the yarn itself, so that the twist does not cause problems in the finished fabric.  Yarn made of several plies (i.e., twisted, then countertwisted) is one familiar example.  However, sometimes these spinning strategies do not succeed, or sometimes we knitters inadvertently add excess twist to yarn by winding and re-winding yarn, center-pulling each time. 

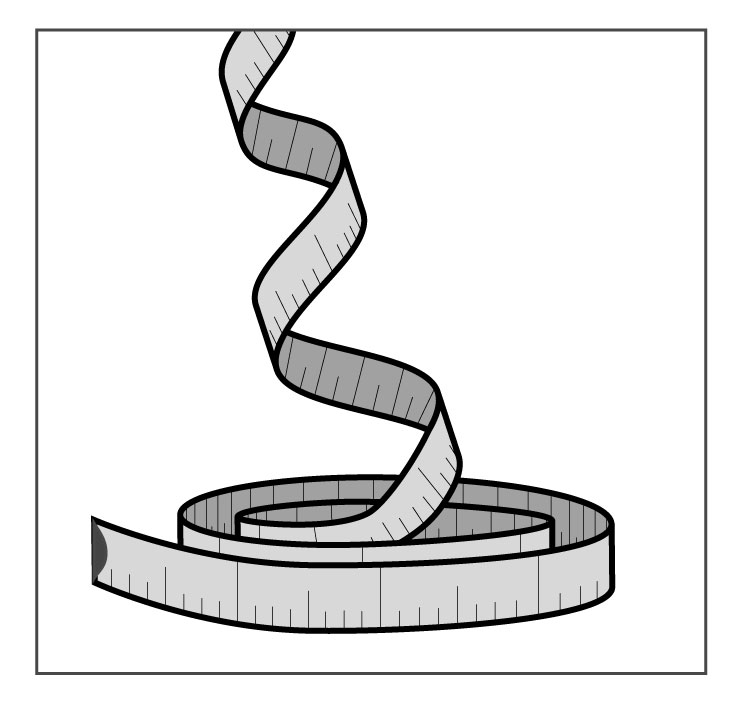
The most obvious announcement of overtwisted yarn is when the yarn itself humps up, twisting and writhing in the stretch between the skein of yarn and the knitting.  

overspun yarn twisting and writhing

This sort of overtwisted yarn is usually dealt with by stopping every so often and letting the project dangle, slowly turning and turning, to rid the excess twist. 

Although this sort of overtwisted yarn is annoying, at least you know what you have and can take steps.  More often, overtwist is sneakier than this.  The yarn is overtwisted, yes, but not enough to announce itself in the yarn.  Instead, this sneaky kind of overtwist announces itself first when the finished fabric biases (slants). 

biased knitted fabric
Biased fabric is actually all-too-common.  Commercially knit garments often suffer this problem, and it is most obvious when you see sweater seams not hanging straight, but instead, spiraling around the torso of the wearer. Sometimes, not only do the seams spiral, but the entire garment is biased ("racked") also. Hand knit garments, sadly, can also suffer this problem.  

biased ("racked") garment with spiraling seams
It may happen that the yarn itself is overtwisted when bought, a sad state of affairs.  However, we can at least avoid ADDING to the problem, and that is why it pays to take whatever steps possible to avoid creating additional, excess yarn twist. The previous post indicates how to do this:  smoothly unspooling yarn from the outside of the skein or cake into which it is wound.  

(PS: Since the last post, I found a demo of a neat-o gadget which helps with smooth unspooling: a "yarn susan." The demo at the link does not mention the twist issue, but does clearly show what unspooling smoothly from the outside of a skein ought to look like.)

--TK  
You have been reading TECHknitting blog on "avoiding twisted yarn--why does it matter?"

Tuesday, January 18, 2011

Ball winders, part 2: avoiding yarn twist

In the immediately previous post, TECHknitting blog showed many uses for a ball winder. "Sometimes," said I, "it is necessary to wind and re-wind yarn three and even four times to get long-color repeat yarns to lay as they should." (Said not so succinctly, but that was the gist.)

Several alert and knowledgeable readers wrote in to comment that I had better watch out--all that winding and re-winding would impart a twist to my yarn, a twist I might live to regret.  "Perhaps you should not wind and re-wind quite so freely" was the consensus.

My education has included lab classes to learn firsthand the value of experimentation, yes sir, so I determined to get to the bottom of this scientifically. Here's my lab report.
_______________________________________________
LAB REPORT on TWIST in YARN 
due to WINDING YARN 
on a BALL WINDER
by TECHknitter
January 18, 2011

QUESTION TO BE ANSWERED
Does winding on a ball winder cause yarn to twist?

ANSWER
It is possible to avoid imparting twist when winding and re-winding yarn on a ball winder.

TOOLS EMPLOYED
  • scotch tape (taken from where it usually lives, thus upsetting everyone here at chezTECH)
  • four tape measures, each with an inch side and a centimeter side
  • my trusty umbrella swift
  • the ball winder at the root of the matter
    EXPERIMENTAL DESIGN
    Step 1: The tape measures were scotch-taped together into a flat 4-yard long snake, all the inch marks on one face, all the cm marks on the other

    Step 2: The 4-yard long tape was wound onto the umbrella swift, laying smoothly.

    Step 3: the tape measure-snake was wound from the umbrella swift onto the ball winder.

    RESULT
    If the tape measure was smooth on the umbrella swift, it wound smoothly onto the ball winder.  If the ball winder handle was turned one way, the inch side faced outward, if the handle was turned the other way, the cm side faced outward, but in neither case was any twist imparted to the "cake" of tape-measure on the ball winder. NO TWIST.

    I'll say it again: If the yarn lay smooth on the umbrella swift, it didn't matter which way the handle was turned.  There was NO TWIST in the flat tape.

    However, now it gets interesting.  As soon as the tape-measure was attempted to be CENTER-PULLED out of the cake into which the ball-winder had deposited it, there appeared the TWIST the commenters prophesized.  In other words, there was twist, yes, the alert commenters were 100% correct.

    However, lucky for me and my ball-winding ways, it wasn't the winding which caused the twist--it was center-pulling the resulting cake which twisted the tape. 

    "it is center pulling ... which twisted the tape."


    But now it gets even MORE interesting. Pulling from the outside of the tape-measure cake also produced a twist UNLESS I took the trouble to turn the cake as I tried to "knit" the tape. Fastening the tape-measure (more scotch tape, yes) on a lazy susan (stolen from the kitchen) then pulling the tape-end resulted the lazy susan spinning around, and the tape coming off with a smooth un-spooling and NO TWIST.

     CONCLUSION
    There are two important consequences:  first, when using the ball-winder to wind FROM a skein, the yarn being re-wound must not be center-pulled from the skein to the ball-winder, for that would twist the yarn.  (This is a corollary of the fact that center-pulling from a cake twists yarn: the same would happen from a skein!) Instead, the yarn skein being re-wound must be unwound from the skein's outside.

    Luckily for me, this I have almost always done, putting the skein into a deep basket from which it cannot jump when pulled.  I might preen and say I unwound skeins from the outside on purpose, but that'd be lying:  rewinding from the outside rather than center-pulling resulted from mere lazy disinclination to battle tangled skein innards (known, in strictly technical terms, as "yarn barf.")

    The second important consequence is that yarn from cakes which is to be unwound for either knitting-up or further re-winding must be smoothly unspooled from the outside.  Once again alert and clever commenters have come to the rescue, and two different solutions have been proposed:

    • a lazy-susan-type device with a spindle onto which the yarn cake is impaled, and which, smoothly spinning, unspools yarn from outside the cake when the outer yarn end is pulled  OR
    • a toilet-paper holder or similar spindle onto which the cake--having first been wound onto a toilet-paper core--is placed to smoothly unspool the yarn from the outside of the cake

    SUMMARY
    IF you center-pull yarn from skeins or cakes, you will get twist.  IF, however, you always unwind cakes or skeins from the outside, AND smoothly unspool caked yarn via a lazy susan or core-and-spindle, then winding and rewinding will NOT TWIST THE YARN. 

    In this manner, it is possible to make full use of a ball-winder as shown in the previous post, and all without imparting twist.
    _______________________________________________
    Well, that's the end of the lab report, and all's well that ends well.

    Although now I come to think of it, "well" is a relative term. I still have to explain why the lazy-susan has migrated from the kitchen to sit by the ball-winder, and why the paper towel dispenser from the basement is upstairs wearing a yarn cake on a toilet-paper core.  However, at least the scotch tape is back where it belongs, so that's a start, right?


    * * *
    A big thank you to the commenters on the previous post: Honnay, who first flagged the problem and Mercuria and Jennigma who explained further.  (Talk about scary--they're all three engineers!) Many thanks also to GJabori who suggested the lazy susan, and June, who explained further, as well as suggesting the toilet paper core and spindle. Thanks for reading, thanks for commenting and good knitting!

    Update 2022: Have a look here-- a long straight and crocs.  Hahaha. 
    https://www.tiktok.com/t/ZTRHdL3sX/

    --TK
    You've been reading TECHknitting blog on: avoiding yarn twist when using a ball winder.

    Monday, January 17, 2011

    The ball winder--a useful tool, especially with long color repeat yarns

     Note--this is part 1 of a two part series on ball-winders.  The second part, about imparting twist to yarn by winding, can be found here. 

    * * *

    For many many years, there was no ball-winder at chezTECH.  After all, most yarn comes in an orderly skein, and the occasional hanked yarn was not too hard to wind by hand. However, a few years ago, a ball-winder did sneak in here.

    ball winder

    At first, it was only used for hanked yarns, being taken down and put up for the occasional use.  Over time the darn thing proved more and more useful, until now it is never put away because it's practically indispensable.  Specifically, it has gradually become the practice around here to re-wind nearly all yarn before use.  The more I do it, the more it saves my hide because rewinding finds trouble before the knitting starts.
    • Knots are easier to splice out during the rewinding process, rather than having one (inevitably) pop up in the middle of a complex lace or stitch repeat.  For non-spliceable yarn, better to wind two separate balls. The coming end clearly announces itself so the join can be put at an inconspicuous place.
    • In rustic yarns, the bits of brush, dirt and other trash spun into the yarn show right away and can get picked out before the knitting starts.
    • Weak strands: even factory-standard yarns feature this problem from time to time, while some thick-and-thin yarns get SO thin in spots as to require editing.
    • Insect damage (ewwww)!  Old woolen yarn from yard-sales, de-stashing swaps, store clearances always gets re-wound before letting it fraternize with existing stash ever since nasty wormies were found actually crawling around some garage-sale yarn. 
    When using long-color-repeat yarns, the ball winder is particularly useful.
    • Not all purchased skeins are wound in the same directions of repeat.  Winding the skein using a ball winder reveals this instantly.  By winding-off and then re-winding, it is possible to make all the yarn lay in the same direction.  
    • Alternatively, sometimes the yarn ought to lay in the opposite directions.  For example, the two cakes of yarn below each contain one entire repeat of all the colors in Kauni EQ (rainbow).  Each is wound opposite to one another in preparation for knitting a symmetrical rectangular scarf.  By starting at the outside of the left cake and ending at the inside of the right cake, the scarf will begin with a purple end, followed by a complete color repeat up one side, a blue middle where the last of the left ball is to be spliced to the first of the right ball, then a matching color repeat down the other side and the scarf will end as it began, in purple. (For an explanation of why the cakes will be knit in that order, click here.)
    2 cakes of yarn, each containing a complete repeat of all colors 
    in rainbow Kauni (EQ) each wound opposite to one another
    • In very, very long repeats, such as the Kauni yarn above, it is scarcely possible to match up color repeats--repeats which are scattered over several different skeins-- without winding and splicing and re-winding, and sometimes, splicing and re-winding again--tedious to do by hand.  To get these two complete color repeats required splicing parts of three different skeins together and three bouts of winding.  Making them lay opposite required one cake to be rewound for a fourth time. 
    • Some otherwise gorgeous long-color-repeat "art" yarns may contain colors which might be jarring, such as a stripe of black in a skein of pastel colors, or a color from a completely different colorway altogether. (Hello Noro, I'm talking to YOU!) Winding into a cake shows the whole color scheme in a glance, making it easy to "edit out" unwanted colors. 
    • Worse, sometimes long-color-repeat yarns have colors missing, such as where two disparate colors are joined by a knot.  Much better to find out before the knitting begins.
    In a similar vein, when trying for identical twins from self-striping sock yarn put up in 50-gram skeins, the ball winder easily lets--
    • Yarns from the two different skeins lay in the same order.
    • Each sock start at the same color repeat. 

    Bottom line: if you don't have a ball-winder, it obviously doesn't mean you can't knit. Many fine knitters don't ever use them and I got along pretty well without one for, literally, decades.  However if you DO have one, you may find it worthwhile to use it more regularly, and the more so for long-color-repeat yarns.

    * * *
    This is part 1 of a two part series on ball-winders.  The second part is about how to avoid imparting twist to your yarn as you wind and rewind it. 
    --TK
    You have been reading TECHknitting blog on ball-winders 

    Friday, January 14, 2011

    A neat little edging for garter stitch

    Worked back and forth by knitting on every row, garter stitch makes the easiest-to-create of all hand knitted fabrics. However, where the edge is exposed, such as on a scarf or afghan edge, there is often trouble. There may be waving, ruffling, stretching. This trouble may announce itself at the time of knitting, as when an edge comes off the needles a bit loose and wavy, as shown below.

    Garter stitch fabric, a bit loose and wavy, before edging

    However, somewhat loose fabric is not the only situation where this trouble may arise. Even tight, well-executed garter stitch fabric may face this problem in the future, as it stretches into ruffles while it is worn.

    Today's post shows an uber-easy edging which will cure existing garter-edge problems and prevent future ones.

    Tight (back) and loose (front) garter stitch fabric, edged

    This edging can be applied with a knitting needle, although it is easier to do it with a crochet hook, as illustrated. This technique is called "slip stitch" and creates a neat little chain around the garment.  The chain constrains the edge.  Once edged, the garter stitch fabric can stretch sufficiently to preserve the knitting's stretchy nature, but not so much as to permit ruffling.

    As far as appearance, chain edging garter stitch offers a simple design element, suitable to all. Both MrTECH--that fashion-averse curmudgeon, and MsTECH--that teen fashion-setter, find this edging attractive--a rare case of agreement between these fashion-opposites.

    Here's how, in 3 steps.

    Step 1: Insert the crochet hook (or knitting needle) through the edge of the fabric.  Take a note of just WHERE on the stitch you are inserting--as long as you insert into the same part of every stitch, you will get a pleasant, consistent edging.  I think it looks best to insert a bit off the very edge, leaving a bit of the original garter edge showing above the chain as in the photos, but you must use your own judgment--some prefer the look of a chain right along the very edge of the fabric.

    Once the hook (or needle) is through the fabric, catch the running yarn and draw up a loop. Now, go to the next stitch of your garter stitch fabric and again insert, catching the yarn on the hook or needle. The below illustration shows the hook inserted through the fabric, from front to back, catching the running yarn, and about to pull the second loop through the fabric edge--the first loop was pulled through the same manner.


    Step 1

     Step 2: The second loop has been drawn through the fabric. There are now two loops on the hook on the front face of the fabric.

    Step 2

    Step 3: The last step is to draw the second loop  (the one more towards the business end of the hook/needle) THROUGH the first loop (the one more towards the handle).

    As the steps are repeated and the just-pulled-through chain drawn through the one before it on the hook or needle, you will see a pleasant-looking chain forming along the edge of the garter stitch fabric. The chain only shows on the front face of the fabric--there is a neat "stitched" look on the back of the fabric.

    The edge of the fabric will not ruffle and stretch when edged in this manner.


    Step 3

    Of course in this, as in all things, "use makes master" as the Latin saying goes. If your edging is coming out too tight or too loose, change needle or hook size (or pull more or less hard) until you get the "just right" tension you're looking for: firm but not unyielding.  It's very easy to pull this edge out and re-do, so mess around until you like the tension --you'll know when you get there.

    Happy knitting --TK
    PS:  There is a view of another edged garter stitch scarf--a quite tailored one, on Ravelry, if you click here. When you get there, click on the top photo, and then on the "+" sign on the photo, and you will get quite a closeup of the front and the back of this edging on the mustard-colored scarf at the link.

    You have been reading TECHknitting blog on chain edging for garter stitch fabrics

    Tuesday, January 4, 2011

    Unkinking yarn before reuse--why it is a good idea

    A whole lot of test knitting goes on around chezTECH--for every idea which pans out, there are many (many.many.many) which don't.  As a consequence, a whole lot of yarn gets recycled--unraveled, unkinked and reknit.  TECHknitting blog has already shown HOW to unkink yarn, but I thought these photos might show WHY it's such a good idea.

    * * *

    A hank of unraveled yarn before unkinking

    * * *

    Before unkinking, closeup

    * * *

    The same hank after unkinking

    * * *

    After, closeup


    The final step: the unkinked hank wound into a cake on a mechanical ball-winder:

    Unkinked yarn in a cake


    I believe you can see that this unkinked yarn will knit up so much better than the "before" ramen-noodle yarn.

    Unkinking does add delay to the schedule, to allow the yarn to dry. However, wrapping the wet yarn in a thick towel and stomping on it removes an amazing amount of water. Cunningly spreading the hank on drying rack positioned over a radiator or hot-air heating vent can reduce the delay to an overnight, rather than 24 hours. In the summertime, spreading the hank on a drying rack in the shade on a breezy day has a similar speeding effect. (Don't dry yarn directly in the sun--it can become both coarse and faded.)

    Best, TK
    You have been reading TECHknitting blog on WHY to unkink yarn before reuse