Dear readers:
Due to a loss in the family, TECHknitting will be on hiatus until some time in April.
The next two posts will be about two different alternatives to avoid "itchy forehead" syndrome arising from woolen hats.
--TECHknitter
Monday, March 17, 2008
Thursday, March 13, 2008
Why block hand knits? Here's why (and how)!
includes 2 illustrations, click any illustration to enlarge
As to the "why" of blocking: here's a "pocket hat" (made of wool) before it is blocked:

Here's the same hat after blocking:
 These pictures speak for themselves, no?
As for how-to, blocking could make a little book in its own right. There are as many methods to block items as there are knitters, with strong opinions about the "right" way. Here's my own little process to get from unblocked to blocked by the full immersion (a.k.a. "wet-block") method. (For steam blocking, click here.)
1. Swish the newly made item in a sinkful of tepid (barely warm) water, using enough water so that the item floats in the sink loosely. No kneading, scrunching, or roughness: just swishing.
2. Once the item is completely wet, drain the sink and press the item against the sides and bottom to gently squeeze out as much water as possible.
3. Next, supporting the item in the hands and against the sink sides and bottom so it NEVER sags under its own weight, squeeze it snakewise--hand-over-hand.
4. Again supporting the item to prevent sagging, lay it out in a thick and thirsty bath towel. My first lay-out is rather rough, but at the least, I make sure no parts of the garment overlap one another. I roll the item and the towel together, lay the roll on the bathroom or kitchen floor, or even in the bottom of a dry bathtub, then step all over it, barefoot. Doing it in shoes would dirty the towel, doing this in socks would get the socks wet, doing this on a carpet will make the carpet wet--a LOT of water gets pressed out in this step.
5. Next, unroll. Again supporting the item, lay it out on a DIFFERENT dry towel. What happens next depends on the item's size.
7. Elapsed time? 5-10 minutes (well, except for the drying of course--which takes forEVER). And, that's it. W-A-A-Y more professional looking than the same item in the "before" stage.
A: Sadly, yes.The good news? It becomes second nature after a few times. Also, if washing a soiled item, start by swishing through soapy water. Next, swish through plain water (rinse twice). Then come all the other steps. For washing (but not for a first blocking) I personally use a drop or two of Dawn dish soap.
Q: Blocking or washing woolens makes me nervous. What if I ruin my garment by felting it?
A: Felting requites a combination of wetting AND agitation. You can't avoid wetting wool when you wash it but you CAN avoid agitation. Number one precaution: DO NOT WRING OR KNEAD!! Instead, swish, then squeeze gently but firmly. Also, I attribute a good deal of felting-prevention to step number 4--the barefoot walk all over the jelly-roll of handknit and thick towel. This really removes water effectively and quickly, but does not cause any rubbing or wringing action. Oh--one more thing: temperature shocks encourage felting, so avoid them. Make sure your water is always at a mild, tepid temperature. For this same reason, even if you want to speed along the drying, don't overdo exposure to hot dry air--a dryer, for example would certainly result in felting.
--TKYou have been reading TECHknitting on "why you should (and how you can) block hand knitting")
As to the "why" of blocking: here's a "pocket hat" (made of wool) before it is blocked:

Here's the same hat after blocking:
 These pictures speak for themselves, no?
 As for how-to, blocking could make a little book in its own right. There are as many methods to block items as there are knitters, with strong opinions about the "right" way. Here's my own little process to get from unblocked to blocked by the full immersion (a.k.a. "wet-block") method. (For steam blocking, click here.)
1. Swish the newly made item in a sinkful of tepid (barely warm) water, using enough water so that the item floats in the sink loosely. No kneading, scrunching, or roughness: just swishing.
2. Once the item is completely wet, drain the sink and press the item against the sides and bottom to gently squeeze out as much water as possible.
3. Next, supporting the item in the hands and against the sink sides and bottom so it NEVER sags under its own weight, squeeze it snakewise--hand-over-hand.
4. Again supporting the item to prevent sagging, lay it out in a thick and thirsty bath towel. My first lay-out is rather rough, but at the least, I make sure no parts of the garment overlap one another. I roll the item and the towel together, lay the roll on the bathroom or kitchen floor, or even in the bottom of a dry bathtub, then step all over it, barefoot. Doing it in shoes would dirty the towel, doing this in socks would get the socks wet, doing this on a carpet will make the carpet wet--a LOT of water gets pressed out in this step.
5. Next, unroll. Again supporting the item, lay it out on a DIFFERENT dry towel. What happens next depends on the item's size.
- For small items like hats, mittens, and kid's sweaters, pat, tug and smooth the item into shape and let it dry. With the "pocket hat" of the intro photos (which was knitted relatively firmly) I actually grabbed it at the brim and at the top and gave several mighty tugs lengthwise before smoothing.
- Larger garments such as sweaters are sometimes tugged, patted and smoothed, or sometimes they are pinned out. Lace and other openwork with edges which have to be "dressed" into points and scallops are also pinned. For pinning, lay the garment, on its second towel, over a yielding surface--a bed, sofa, fridge box or thick carpet. If a carpet, maybe with a clean sheet spread out to avoid carpet dust in the project.
7. Elapsed time? 5-10 minutes (well, except for the drying of course--which takes forEVER). And, that's it. W-A-A-Y more professional looking than the same item in the "before" stage.
FAQs
Q: Do I have to go through all this every single time I wash a woolen hand-knit?A: Sadly, yes.The good news? It becomes second nature after a few times. Also, if washing a soiled item, start by swishing through soapy water. Next, swish through plain water (rinse twice). Then come all the other steps. For washing (but not for a first blocking) I personally use a drop or two of Dawn dish soap.
Q: Blocking or washing woolens makes me nervous. What if I ruin my garment by felting it?
A: Felting requites a combination of wetting AND agitation. You can't avoid wetting wool when you wash it but you CAN avoid agitation. Number one precaution: DO NOT WRING OR KNEAD!! Instead, swish, then squeeze gently but firmly. Also, I attribute a good deal of felting-prevention to step number 4--the barefoot walk all over the jelly-roll of handknit and thick towel. This really removes water effectively and quickly, but does not cause any rubbing or wringing action. Oh--one more thing: temperature shocks encourage felting, so avoid them. Make sure your water is always at a mild, tepid temperature. For this same reason, even if you want to speed along the drying, don't overdo exposure to hot dry air--a dryer, for example would certainly result in felting.
Q: What about blocking non-wool items?
A: Acrylics don't actually block. Instead, they are meant to be gently machine washed and gently dried--air fluff or low (delicates). To really make acrylic lay flat--such as lace, perhaps--consider steam blocking.
A: Acrylics don't actually block. Instead, they are meant to be gently machine washed and gently dried--air fluff or low (delicates). To really make acrylic lay flat--such as lace, perhaps--consider steam blocking.
Superwash wool is also meant to be gently machine-washed but is is meant to be dried on low (not air fluff). If you block superwash the same way as regular wool, it becomes stringy and grows much larger.
Whatever hand knits you put through a drier, prevent pilling by turning them inside-out. If the item is large or delicate, consider a dryer-gament bag.
Plant-based fibers grow when blocked. Here, prevention is your only true weapon, since pretty much nothing will restore bounce to a cotton, hemp or linen knit once stretched out. These fibers are more known for "drape" than "cling." Plant-based yarns need to be swatched, the swatch blocked and dried, and then the item knitted to the gauge the blocked swatch indicates. By this trick, when you're knitting them, these garments seem to be turning out somewhat small. However, afterwards, they are blocked to size. Alternatively, dry cleaning is less likely to make cotton, hemp or linen stretch.
--TKYou have been reading TECHknitting on "why you should (and how you can) block hand knitting")
Sunday, March 9, 2008
A truly flat hat top (and part 4 of "pocket hats")
5 illustrations, click any illustration to enlarge
*reminder--like the other posts in this series, the top part shows the general directions, the bottom part, directions for the KAL of the "pocket hats" which illustrate the post
 For years, a truly flat hat top in ribbing eluded me. With spiral decreases, no matter how ferocious the rate of decrease, the darn thing never lay flat, nor could I find a suitable pattern for progressively eliminating ribs. With "all-at-once decreases" the ribs became even more distorted and the darn thing still wouldn't lay flat--the 12, 10 or 8 stitches at the top would form a little nipple when the yarn was drawn through--not quite the thing. On both kinds of decrease, the needles at the top of the hat went slipping out as fewer and fewer stitches remained. But today, I go on my way rejoicing, because a few months ago, a new trick revealed itself to me, a ...
One little note before leaving step 1: On a 2x2 ribbing, the rate of decrease in step A leaves 3/4 of the original number of stitches on your needles.

Including the set-up row, written succinctly, step B is in 2 rounds:
Three little notes before we leave step B:
Changing gauge is not a conventional method of decrease, so it bears repeating one more time: by switching to a smaller needle, you are putting a lot less yarn into the fabric, and this creates a decrease all by itself. In other words, you will now: *switch to needles 2 sizes smaller and use these smaller sized needles for the remainder of the hat top.*
As it happens, in step C we NOT ONLY want to tighten up all the future stitches we are going to knit, but we ALSO want to decrease away even more of them. Therefore, IN THIS SAME ROUND that you're switching to smaller needles, you are ALSO going to do another k2tog decrease all around.
The k2tog's will look best if you arrange matters so that the purl stitch lays behind the knit stitch when the k2tog is finished. Written succinctly, and incorporating the previous part about smaller needles, step C can be summarized:
 After this decrease, work an additional round or 2 with the smaller needles and this will end step C.
Two little notes before leaving step C:
In Step F, the last step, you Kitchener-stitch (graft) the top of the hat together. Step E-- just before that final grafting--is a last decrease round in which you're going to decrease away the remaining number of stitches by half. So, in order to have the correct number of stitches for steps E and F, this step--step D--gets rid of any extra stitches which would throw off final stitch counts. In other words, this step, D, is a "set-up round." As you may remember from middle-school math, only numbers which are multiples of 4 (4, 8, 12, 16, 20, 24, 28, 32, 36, 40 or 44, etc.) will yield an even number when further divided by 2. In other words, round E gets rid of half the remaining stitches, and the number of stitches at the end of round E has to be an even number of stitches, so rounds E and F will only work if we use round D to decrease away any leftover stitches ahead of time.
Written succinctly, in step D you must proceed as follows:
To make it easier, the little TRICK in this step is that you can either use a smaller needle (a tiny sock needle) OR a crochet hook to work the actual decreases, then replace the resulting loops back onto the needles you have been using (replacing the stitches back on the needles they came from assures that these last loops are of the correct diameter for step 6, replace the stitches RIGHT ARM FORWARD so they are in the correct position for step F).
Kitchener-stitching the top shut achieves three big aims:
 This decrease looks very well, and goes very fast--faster and faster on each round as you decrease away more and more stitches.
*reminder--like the other posts in this series, the top part shows the general directions, the bottom part, directions for the KAL of the "pocket hats" which illustrate the post
 For years, a truly flat hat top in ribbing eluded me. With spiral decreases, no matter how ferocious the rate of decrease, the darn thing never lay flat, nor could I find a suitable pattern for progressively eliminating ribs. With "all-at-once decreases" the ribs became even more distorted and the darn thing still wouldn't lay flat--the 12, 10 or 8 stitches at the top would form a little nipple when the yarn was drawn through--not quite the thing. On both kinds of decrease, the needles at the top of the hat went slipping out as fewer and fewer stitches remained. But today, I go on my way rejoicing, because a few months ago, a new trick revealed itself to me, a ...
TRULY FLAT TOP
for a ribbed hat
In the top part of this post -- the general directions -- the number of plain rounds to work between the decreases is left vague, partly because much depends on the yarn you're using: baby weight requires more plain rounds between decreases than does bulky yarn. In the bottom part of this post, round-by-round directions are given for the hat top in double knitting weight (DK, also called "light worsted") and you can use these row-by-row directions as a starting point, adding plain rows for thinner yarn, subtracting for thicker.for a ribbed hat
This hat top features 5 decrease rounds and a final working together at the top, 6 steps in all: these are labeled steps A through F on the illustration, and are described in the text. Step D is not labeled on the illustration because it is only a minor (although mathematically important) decrease. Some of these steps are ordinary decreases with which you are familiar: knit 2 together (k2tog) and purl 2 together (p2tog), but some of these steps have a little trick involved.

Part 1: general directions for the truly flat hat top
STEP A (decrease on the purl ribs)
This first round of decreases features an ordinary decrease done on the PURL stitches. Written succinctly:- *purl 2 together, knit 2* all the way around the first decrease round
One little note before leaving step 1: On a 2x2 ribbing, the rate of decrease in step A leaves 3/4 of the original number of stitches on your needles.
Step B (decrease on the knit ribs)
On this step, a knit 2 together (k2tog) decrease is done on the knit ribs. However, there is TRICK: an extra round added, a set-up round where only the purl stitches are worked, while the knit stitches are not worked at all, only slipped. As shown in the illustration, working the k2togs WITHOUT the set up row results in flabby, slanted stitches, while WITH the set up row, the stitches are more upright. 
Including the set-up row, written succinctly, step B is in 2 rounds:
- round 1 (set up round): * p1, slip the 2 knit stitches of the knit rib purlwise, while holding yarn in back* all the way around the round.
- round 2 (decrease round): *p1, k2tog* all the way around the round.
Three little notes before we leave step B:
- After this step, you will have 1/2 of your original stitch count on the needle.
- From here on out, when you come to count rows, it will look like you lost a row -- if you find that you need to count rows, the row on which you slipped the knits will be invisible--you won't be able to see it unless you turn the work inside out to count rows!
- Performing the decreases on this round will certainly result in so few stitches that they cannot POSSIBLY be stretched around a circular needle, however short. Therefore, if you were not already working on double pointed needles (dpn's) or by the magic loop technique, you would have to switch to one of those techniques now.
Step C (decrease away all purl ribs, change gauge)
The problem now is that there is STILL too much yarn and too much slack to make a hat top lay nicely flat. So the little TRICK of this step is to CHANGE GAUGE. Yes, simply by knitting with a smaller needle (2 sizes smaller works well) you'll be putting a lot less yarn into the hat top, and that'll help a lot with laying smooth.Changing gauge is not a conventional method of decrease, so it bears repeating one more time: by switching to a smaller needle, you are putting a lot less yarn into the fabric, and this creates a decrease all by itself. In other words, you will now: *switch to needles 2 sizes smaller and use these smaller sized needles for the remainder of the hat top.*
As it happens, in step C we NOT ONLY want to tighten up all the future stitches we are going to knit, but we ALSO want to decrease away even more of them. Therefore, IN THIS SAME ROUND that you're switching to smaller needles, you are ALSO going to do another k2tog decrease all around.
The k2tog's will look best if you arrange matters so that the purl stitch lays behind the knit stitch when the k2tog is finished. Written succinctly, and incorporating the previous part about smaller needles, step C can be summarized:
- arrange matters so that one purl stitch is on the tip of your left needle, with a knit stitch the left of that. *Knit together the knit stitch with the purl stitch* all the way around the round, using the smaller needles.
 After this decrease, work an additional round or 2 with the smaller needles and this will end step C.
 Two little notes before leaving step C:
- After this step, you will have 25% of your original stitch count on the needles.
- In this step, you work away all the purls, and all the rest of the hat top will be by means of knit stitches only.
Step D (another set up row, possibly with decreases)
In step D, you're going to decrease away as many stitches as are needed so that at the end of the step, you'll have a multiple of 4 stitches on your needles. If the number of stitches on your needles is ALREADY divisible by 4, then you're all set, just knit a round plain. If you wonder WHY you need a multiple of 4, there is a green paragraph of explanation. If today is not a "why" day for you, just scroll past.In Step F, the last step, you Kitchener-stitch (graft) the top of the hat together. Step E-- just before that final grafting--is a last decrease round in which you're going to decrease away the remaining number of stitches by half. So, in order to have the correct number of stitches for steps E and F, this step--step D--gets rid of any extra stitches which would throw off final stitch counts. In other words, this step, D, is a "set-up round." As you may remember from middle-school math, only numbers which are multiples of 4 (4, 8, 12, 16, 20, 24, 28, 32, 36, 40 or 44, etc.) will yield an even number when further divided by 2. In other words, round E gets rid of half the remaining stitches, and the number of stitches at the end of round E has to be an even number of stitches, so rounds E and F will only work if we use round D to decrease away any leftover stitches ahead of time.
Written succinctly, in step D you must proceed as follows:
- If on your needles, you have ANY NUMBER OF STITCHES DIVISIBLE BY 4, you're all set: just knit one round plain. If, however, you have ANY OTHER sort of a number, you must use this step to bring the number of stitches on your needles to the nearest multiple of 4 by knitting 2 stitches together as many times as needed. You can simply put the necessary number of decreases anywhere at random in this round, just so long as you don't put them next to one another.
Step E (last decrease round)
This step is simply a round of k2togs--and it is the last decrease round. The only thing remarkable about this round is that these last decreases are a bit miserable. As a result of previously switching to smaller needles in step C, these stitches are already at a very small gauge. Knitting two together at this gauge (and on so few loops) means stitches that just want to POP off the needle. However, persevere, because the final result is worth it.To make it easier, the little TRICK in this step is that you can either use a smaller needle (a tiny sock needle) OR a crochet hook to work the actual decreases, then replace the resulting loops back onto the needles you have been using (replacing the stitches back on the needles they came from assures that these last loops are of the correct diameter for step 6, replace the stitches RIGHT ARM FORWARD so they are in the correct position for step F).
Step F (graft--a.k.a. Kitchener stitch--the hat top shut)
Arrange the stitches so that they are divided in half. If you are working on dpn's, arrange 1/2 the stitch count on each of two needles. If you are working by magic loop, put 1/2 the stitch count on each needle of your magic loop set-up. The grand finale, the final TRICK of this hat top, is to graft the top together. (Click here for an easy method of Kitchener stitching.)Kitchener-stitching the top shut achieves three big aims:
- first, the short lengthwise graft pulls the entire top into the pleasant-looking oval shape of the finished decrease (see illustration below)
- second, grafting prevents you from having to work final decrease rounds on a tiny number of stitches, with needles falling out in all directions and
- third, it makes a really smooth top, avoiding the pointy-looking decreases of other hat tops
 This decrease looks very well, and goes very fast--faster and faster on each round as you decrease away more and more stitches.
Part 2: Round-by-round directions for the pocket hat KAL
In the previous post of the pocket hat KAL, we left the pocket hats 4 stripes high, with the fifth color just added by the jogless back join method. In this post, all the decreasing of the entire hat will be done in this final color.
The row instructions are written for the Watch Cap.
For the Stocking Cap, add another round in pattern between rows 2 and 3.
For the Rasta Hat add another round in pattern between rows 2 and 3 and also between rows 5 and 6.
Stitch counts appear for the two different widths of hats (116 sts = regular size, 120 sts = extra large head size)
If you are following along in the KAL, the steps still remaining to a finished hat are
--TECHknitter
PS:
The row instructions are written for the Watch Cap.
For the Stocking Cap, add another round in pattern between rows 2 and 3.
For the Rasta Hat add another round in pattern between rows 2 and 3 and also between rows 5 and 6.
Stitch counts appear for the two different widths of hats (116 sts = regular size, 120 sts = extra large head size)
- Round 1: After performing the jogless back join in the new color yarn, knit around (no purling) ending just before the first two purl stitches to be worked in the new color. Place marker. (116, 120 sts)
- Rounds 2 and 3: *p2, k2* repeat around (for stocking cap and rasta hat, add another round between rounds 2 and 3, per note in PURPLE, above)
- Round 4: *p2tog, k2* repeat around (87, 90 sts remaining) ROUND 4 corresponds to STEP A of the general directions in part 1 of this post, above.
- Rounds 5 and 6: *p1, k2* repeat around (for rasta hat, add another round between rounds 5 and 6, per note in PURPLE, above)
- Round 7: *p1, sl2* repeat around. (Slip stitches purlwise so as not to twist, slip with yarn in back.)
- Round 8: *p1, k2tog, repeat around (58, 60 sts remaining). Things will start to get tight at this round – it’s time to switch to dpns or the magic loop technique if you haven't done so already. ROUNDS 7 and 8 correspond to STEP B of the general directions, above.
- Rounds 9 and 10: *p1, k1* repeat around
- Round 11: Switching to needles 2 sizes smaller, and using a long magic-loop type set-up, or a set of dpns, *k2tog* around, setting up so that you have (15, 15) stitches on your first needle, and (14, 15) on the second (29, 30 stitches remaining). ROUND 11 corresponds to step C of the general directions, above.
- Round 12: Knit plain (no further purling on this hat top).
- Round 13: In order to make the final graft work on this hat it is important to have a multiple of 4 stitches at this point:
- For the 116 st hat: k13, k2tog, k to end of round (28 sts remaining)
- For the 120 st hat: k13, k2tog, k13, k2tog (28 sts remaining). ROUND 13 corresponds to step D of the general directions, above.
- Round 14: k plain
- Round 15: *k2tog* around. (14, 14 sts remaining). ROUND 15 corresponds to step E of the general directions, above.
- Round 16: Kitchener-stitch the top of the hat closed. ROUND 16 corresponds to step F of the general directions, above.
If you are following along in the KAL, the steps still remaining to a finished hat are
- BLOCKING and
- TWO ALTERNATIVES to conquer ITCHY-FOREHEAD syndrome
--TECHknitter
PS:
* * *
ADDENDUM, 2011: The KAL laid out above stretches out over 5 posts, of which this is fourth, and it is free. However, some folks have written to say they find it hard to follow the pattern over so many posts. So...if you like, you can buy the pattern in an easy-to-print, all-in-one place pdf.
* * *
PS: Tuesday, March 4, 2008
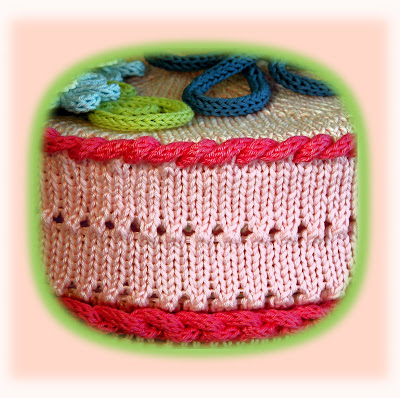
THANK YOU (and have some cake!)
4 illustrations, click any illustration to enlarge
Dear Readers:
TECHknitting has recently passed some milestones, so it's time to take a little break from all the TECH-nical stuff to thank you all. The Bloglines readership recently passed the 1000 count, readership on other rss-feed services is booming also, Ravelers voted TECHknitting the "most educational blog," and a round dozen bloggers awarded TECHknitting the "you make my day award." So, THANK YOU ALL VERY MUCH for your votes, your support and all the awards! And ...
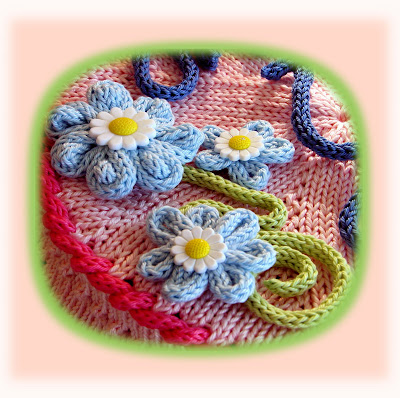
Close up of the inscription:
 Many thanks again, dear readers.
--TECHknitter (You have been reading TECHknitting on "Have some cake!")
Dear Readers:
TECHknitting has recently passed some milestones, so it's time to take a little break from all the TECH-nical stuff to thank you all. The Bloglines readership recently passed the 1000 count, readership on other rss-feed services is booming also, Ravelers voted TECHknitting the "most educational blog," and a round dozen bloggers awarded TECHknitting the "you make my day award." So, THANK YOU ALL VERY MUCH for your votes, your support and all the awards! And ...
HAVE SOME CAKE!

Here's some luscious frosting:

Here's some luscious frosting:

Close up of the inscription:

One more look:
 Many thanks again, dear readers.
--TECHknitter (You have been reading TECHknitting on "Have some cake!")
Monday, March 3, 2008
Jogless ribbing STRIPES with a trick to work your ends in as-you-go (also part 3 of "pocket hats")
Among the several methods to work your ends in as you go, this blog has previously introduced the "back join." Among the methods to avoid a "jog" when striping in the round, this blog has previously introduced "jogless stripes, a new method."
The top part of today's post shows a variation on these two tricks--a JOGLESS BACK JOIN as adapted for 2x2 ribbing. In other words, today's post shows a new 2-in-1 adaptation, so that in ribbing you can:
1. (below) The jogless back join is done on seven stitches.

2. (below) Step 2 is a MEASURING step. Starting with the leftmost stitch of the last k2 rib in the color change round -- the stitch in column 1 on the diagrams -- work three additional stitches. Mark the spot where the running stitch emerges from the third stitch. In the diagram, that spot has been drawn with a blue dot, but in real life, you could mark the spot with a pin, or by pinching it and not letting to, or with a small dot of tailor's chalk. The point is to measure off the amount of yarn it will take to work 3 stitches, and mark that length.
3. (below) Having marked the correct spot, you will now unravel those three stitches you worked (stitches 1, 2 and 3) and replace them on the left needle. As you can see, stitches should be replaced RIGHT arm forward. At the spot you've marked, interlock the old yarn and the new yarn.
Three little things to note about this step:

4. (below) Using the doubled-over yellow yarn, you will now re-do stitches 1, 2 and 3, working in pattern. "Working in pattern" means that you should knit st 1, and purl sts 2 and 3, which is the same pattern as the underlying stitches. Because you measured the yellow yarn before you interlocked it and doubled it back, the three re-worked stitches should exactly use up the yellow yarn, and the yellow stitches should end at the interlock. If for some reason the interlock is not where it ought to be, no big deal--just unravel and re-knit these three stitches once again, adjusting the interlock location until it comes out just behind stitch 3, as shown.
5. (below) You are now going to SLIP STITCH 4. As shown in the illustration, when you grab this stitch and slip it up to your right needle, you are going to slip it RIGHT arm forward (untwisted). After slipping stitch 4, you will then knit the first 3 stitches in the new (orange) color. As with the yellow yarn, you will work these stitches with the doubled over yarn (2 strands of yarn) which result from the interlock. By knitting stitches 5, 6 and 7, you are working in the orange tail. One more important thing to note about this step: at this point you are NOT working in pattern. In fact, you will now knit the rest of this first round of the new color (no purling), and this is to avoid "icky dots" in ribbing, as explained in the immediately previous post.
6. (below) After knitting in orange all the way around the round (no purling) you will now knit stitch 4--that being the stitch you slipped in the previous step. After knitting stitch 4, you are going to slip its partner--stitch 5. Be careful here and remember that this stitch you are about to slip--stitch 5--is actually a stitch knit from doubled-back yarn. Therefore, when you come to slip, be careful to grab BOTH loops of this stitch. As you can see, when you grab this doubled stitch and slip it to your right needle, you should slip it RIGHT arm forward, so it lays untwisted.
This is also the time to snip loose the yellow yarn--as the diagram shows, the yellow yarn is no longer attached to the ball, but is now a disconnected tail.
After slipping stitch 5, you return to pattern. In other words, after this step, have completed round 1 of the new color (orange) and you would purl 2, then knit 2, and so on, matching the pattern of the underlying ribbing. If you have been using a stitch marker to mark the beginning of the round, you would now place it just to the left of slipped stitch 5. From here on out, you will work the new color normally, which means that when you come all the way around, you will simply knit off the slipped stitch at the end of the round as if it were any other knit stitch.
7a. (below) This is the finished fabric. Stitches 1, 2 and 3 have the last tail of the yellow worked into them. The next two stitches--4 and 5-- have each been slipped once. The tails of the new (orange) yarn have been worked into stitches 5, 6 and 7. If you look carefully at the diagram, you'll see that the stitches look crooked and uneven, but...
7b. (below) ... diagrams are limited. The join "in the wool" as shown below, shows no jog. As you can also see, the extra loop of stitch 5 does not show. If you find in your own work, that the double loop at stitch 5 does show a little bit, dig around on the back of the fabric with a small knitting needle, and once you locate the "back" of the two loops, tug on it to make it disappear.
So far, the directions in previous posts (click here) have taken the hat to the top of the first color stripe. You will now change colors as shown in this post, and again knit the number of rounds for the hat you are making (somewhere between 13 rounds for the shortest style--the watch cap, and 16 rounds for the longest style--the rasta hat). Continue using this same color change technique to striping your way up the hat to the top (5th) stripe. When you get there (just past the color change for last color) wait for me--the next post will incorporate 3 more tricks to make a truly flat hat top.
--TECHknitter (You have been reading TECHknitting on: Jogless stripes in ribbing with no ends to weave in)
The top part of today's post shows a variation on these two tricks--a JOGLESS BACK JOIN as adapted for 2x2 ribbing. In other words, today's post shows a new 2-in-1 adaptation, so that in ribbing you can:
- work your ends in as you go AND
- create jogless stripes
* * *
ADDENDUM, 2011: The KAL laid out below stretches out over 5 posts, of which this is the third, and is free. However, some folks have written to say they find it hard to follow the pattern over so many posts. So...if you like, you can buy the pattern in an easy-to-print, all-in-one place pdf.
* * *
Part 1: The JOGLESS BACK JOIN for 2x2 RIBBING
a TUTORIAL in DIAGRAMS
a TUTORIAL in DIAGRAMS
1. (below) The jogless back join is done on seven stitches.
- the tail of the old color is worked into stitches 1(K), 2 and 3 (both purls)
- the actual join occurs in stitches 4 and 5 (both knits) and the
- tail of the new color is worked into stitches 5 (knit) 6 and 7 (purls)

2. (below) Step 2 is a MEASURING step. Starting with the leftmost stitch of the last k2 rib in the color change round -- the stitch in column 1 on the diagrams -- work three additional stitches. Mark the spot where the running stitch emerges from the third stitch. In the diagram, that spot has been drawn with a blue dot, but in real life, you could mark the spot with a pin, or by pinching it and not letting to, or with a small dot of tailor's chalk. The point is to measure off the amount of yarn it will take to work 3 stitches, and mark that length.

3. (below) Having marked the correct spot, you will now unravel those three stitches you worked (stitches 1, 2 and 3) and replace them on the left needle. As you can see, stitches should be replaced RIGHT arm forward. At the spot you've marked, interlock the old yarn and the new yarn.
Three little things to note about this step:
- As shown in step 3, interlocking the yarns means that each yarn--the old yellow yarn and the new orange yarn--are now doubled back on themselves. That's why this kind of join is called a "back join."
- As you get better and better at the back join, you may find that you are able to skip step 2 (the measuring step) because you are able to accurately estimate where the interlock should be.
- The diagram below employs artistic license. In real life, the yarn resulting from unraveling the 3 stitches will be much longer, proportionately.

4. (below) Using the doubled-over yellow yarn, you will now re-do stitches 1, 2 and 3, working in pattern. "Working in pattern" means that you should knit st 1, and purl sts 2 and 3, which is the same pattern as the underlying stitches. Because you measured the yellow yarn before you interlocked it and doubled it back, the three re-worked stitches should exactly use up the yellow yarn, and the yellow stitches should end at the interlock. If for some reason the interlock is not where it ought to be, no big deal--just unravel and re-knit these three stitches once again, adjusting the interlock location until it comes out just behind stitch 3, as shown.

5. (below) You are now going to SLIP STITCH 4. As shown in the illustration, when you grab this stitch and slip it up to your right needle, you are going to slip it RIGHT arm forward (untwisted). After slipping stitch 4, you will then knit the first 3 stitches in the new (orange) color. As with the yellow yarn, you will work these stitches with the doubled over yarn (2 strands of yarn) which result from the interlock. By knitting stitches 5, 6 and 7, you are working in the orange tail. One more important thing to note about this step: at this point you are NOT working in pattern. In fact, you will now knit the rest of this first round of the new color (no purling), and this is to avoid "icky dots" in ribbing, as explained in the immediately previous post.

6. (below) After knitting in orange all the way around the round (no purling) you will now knit stitch 4--that being the stitch you slipped in the previous step. After knitting stitch 4, you are going to slip its partner--stitch 5. Be careful here and remember that this stitch you are about to slip--stitch 5--is actually a stitch knit from doubled-back yarn. Therefore, when you come to slip, be careful to grab BOTH loops of this stitch. As you can see, when you grab this doubled stitch and slip it to your right needle, you should slip it RIGHT arm forward, so it lays untwisted.
This is also the time to snip loose the yellow yarn--as the diagram shows, the yellow yarn is no longer attached to the ball, but is now a disconnected tail.
After slipping stitch 5, you return to pattern. In other words, after this step, have completed round 1 of the new color (orange) and you would purl 2, then knit 2, and so on, matching the pattern of the underlying ribbing. If you have been using a stitch marker to mark the beginning of the round, you would now place it just to the left of slipped stitch 5. From here on out, you will work the new color normally, which means that when you come all the way around, you will simply knit off the slipped stitch at the end of the round as if it were any other knit stitch.

7a. (below) This is the finished fabric. Stitches 1, 2 and 3 have the last tail of the yellow worked into them. The next two stitches--4 and 5-- have each been slipped once. The tails of the new (orange) yarn have been worked into stitches 5, 6 and 7. If you look carefully at the diagram, you'll see that the stitches look crooked and uneven, but...

7b. (below) ... diagrams are limited. The join "in the wool" as shown below, shows no jog. As you can also see, the extra loop of stitch 5 does not show. If you find in your own work, that the double loop at stitch 5 does show a little bit, dig around on the back of the fabric with a small knitting needle, and once you locate the "back" of the two loops, tug on it to make it disappear.

8. (below) If you think about what you have done, you've slipped stitches 4 and 5 to be sort of "mezzanine" (halfway) stitches. Because they were slipped, they got pulled down to a sort of halfway position between the end of one round and the beginning of the next, and this is what eliminates the "jog" at the end of the round. However, in eliminating the jog by slipping, we've also eliminated 1 stitch from each of column 4 and 5. We're going to make up those missing stitches (one from each column) by adding them at the top of the column. In other words, each successive color change will travel one k2 rib to the left, and in this way, each column of k2 stitches in each color will have the same number of stitches. Another way of saying this same thing is that stitch 5 of the old color change will be stitch 1 of the new color change. If this remains confusing to you, you might like to review "traveling" jogless joins in stockinette, which are explained here -- the principle is the same whether the stitches travel in stockinette or in ribbing. 
Part 2: DIRECTIONS for POCKET HATS
So far, the directions in previous posts (click here) have taken the hat to the top of the first color stripe. You will now change colors as shown in this post, and again knit the number of rounds for the hat you are making (somewhere between 13 rounds for the shortest style--the watch cap, and 16 rounds for the longest style--the rasta hat). Continue using this same color change technique to striping your way up the hat to the top (5th) stripe. When you get there (just past the color change for last color) wait for me--the next post will incorporate 3 more tricks to make a truly flat hat top.
--TECHknitter (You have been reading TECHknitting on: Jogless stripes in ribbing with no ends to weave in)
Subscribe to:
Posts
(
Atom
)